F5 Private Cloud Solutions > 2. Class 2: Deploying Cisco APIC with F5 iWorkflow and BIG-IP Source | Edit on
2.1. Demonstration Requirements
| Required | Optional |
|---|---|
|
|
2.1.1. Demonstration Configuration
This demonstration contains preconfigured users and components to illustrate the scripted scenarios and features of this Cisco solution. All access information needed to complete the demonstration scenario, is located in the Topology and Servers menus of your active demonstration, and throughout this script.
- Topology Menu. Click on any server in the topology to display the available server options and credentials.
- Servers Menu. Click on
 or
or  next to any server
name to display the available server options and credentials.
next to any server
name to display the available server options and credentials.
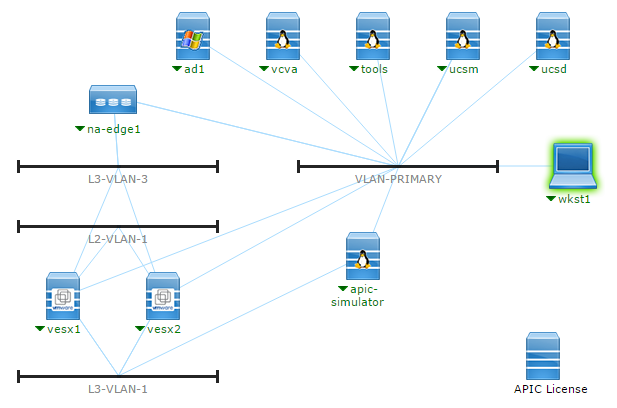
2.1.2. Demonstration Topology
The following is the virtual demonstration topology, which consists of the following virtual machines:
- APIC Simulator – version 2.1(1h)
- APIC1, APIC2, APIC3
- Leaf1 and Leaf2
- Spine1 and Spine2
- VMware Virtual Center Server 5.5 Appliance
- F5 iWorkflow – release 2.0.2
- F5 BIG-IP – release 12.0.0 HF4
- VMware ESXi 5.5 Host 1
- VMware ESXi 5.5 Host 2
- Workstation – Windows 8
- NetApp EDGE Storage Appliance – ONTAP 8.2
- Linux Tools Repository (Ubuntu 12.04)
This demonstration contains preconfigured users and components to illustrate the scripted scenarios and features. All access information needed to complete the scripted scenarios is located in the Topology and Servers menus of your active demonstration, and throughout this script.
2.1.3. Demonstration Preparation
Follow the steps below to schedule and configure your environment.
Browse to dcloud.cisco.com, choose the location closest to you, and then login with your Cisco.com credentials.
Schedule a session. [Show Me How].
Test your bandwidth from the demonstration location before performing any scenario. [Show Me How]
Verify your session has a status of Active under My Demonstrations on the My Dashboard page in the Cisco dCloud UI.
It may take up to 15 minutes for your demo to become active.
Access the workstation named wkst1 located at 198.18.133.36 and login using the following credentials: Username: dcloud\demouser, Password: C1sco12345.
Option 1: (Preferred) Use Cisco AnyConnect [Show Me How] and the local RDP client on your laptop [Show Me How].
- Accept any certificates or warnings.
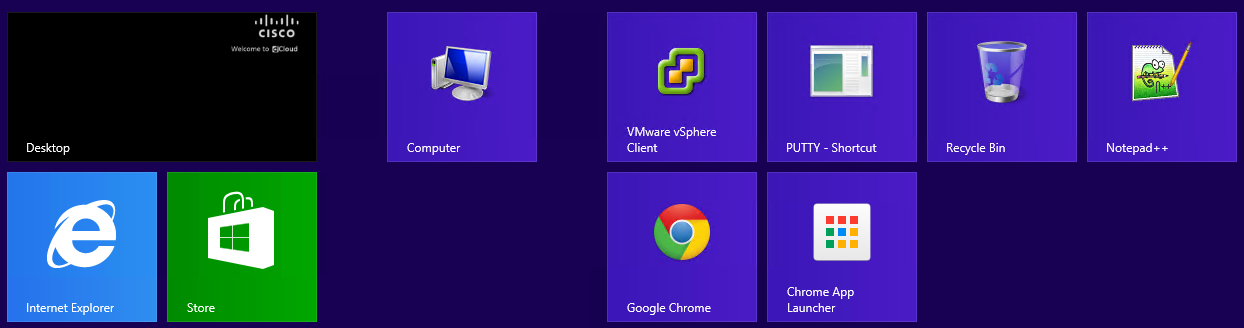
- From the Start menu, click Desktop.
Option 2: Use the Cisco dCloud Remote Desktop client with HTML5. [Show Me How]
- Accept any certificates or warnings.
- From the Start menu, click Desktop.
Start Menu
The fabric discovery is automatically started at demo setup. Double-click the APIC Login icon
 and login
(
and login
(admin/C1sco12345).Select Fabric from the top menu.
Select Inventory from the top sub-menu.
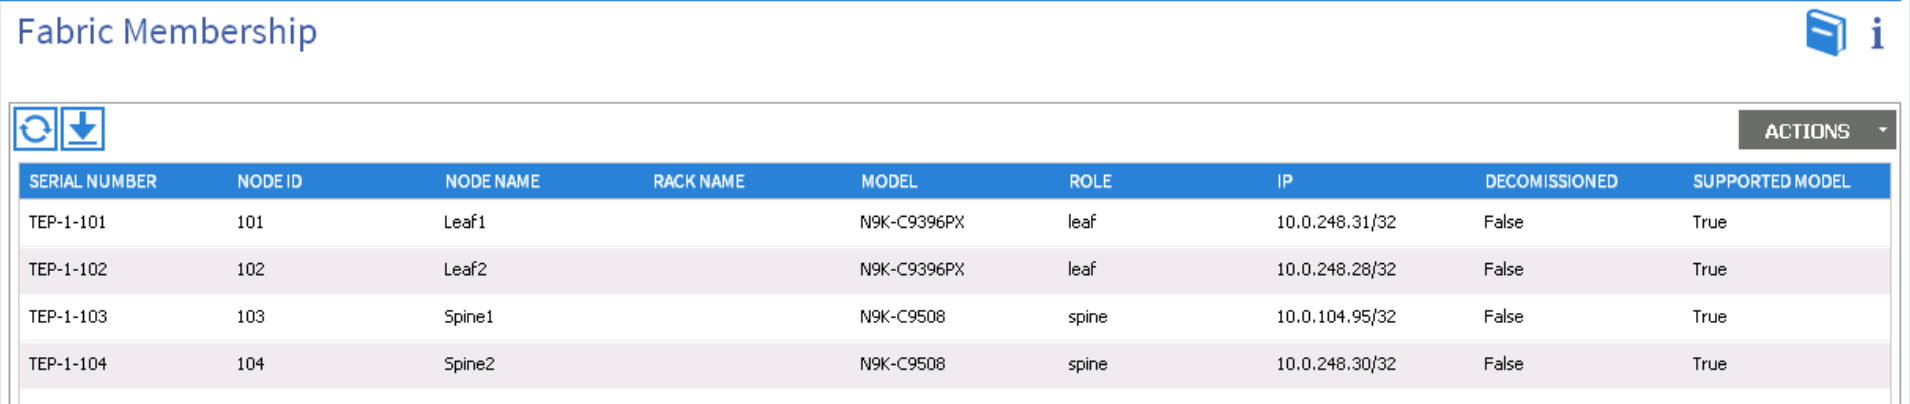
In the left menu, click Fabric Membership and check that you have the 4 devices populated as shown in Figure 3. (IP addresses may vary.)
Note
The fabric discovery can take up to 15 minutes to complete. If you login before 15 minutes have passed, all devices may not be fully discovered.
Completed Fabric Membership
Note
To demonstrate Fabric Discovery, reset the APIC Simulator (see Appendix A.) If only TEP-1-101 is present at login, see Appendix B to discover the Fabric.
Double-click the VI Login icon
 and login with the
following credentials: Username: demouser, Password:
C1sco12345. (If password is grayed out, click Login.)
and login with the
following credentials: Username: demouser, Password:
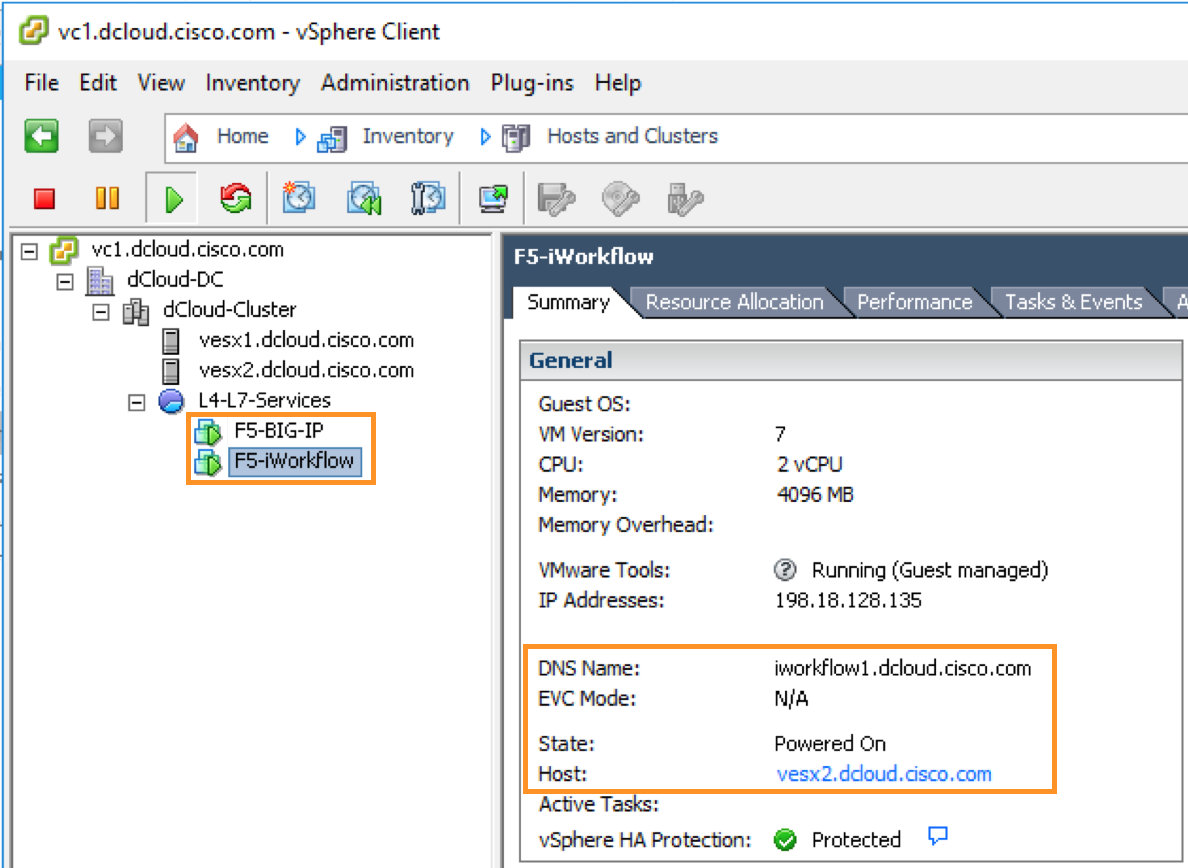
C1sco12345. (If password is grayed out, click Login.)Check that the F5 iWorkflow and BIG-IP virtual machine is present and running as below.
Virtual Center Inventory
Note
If the F5 BIG-IP and iWorkflow VMs are not present in the L4-L7 Services Resource Pool, add it manually.